Eclipse plugin
In this page, we step through the creation of a JSweet program in Eclipse, using the JSweet Eclipse plugin (see also on Github).
Note: under Eclipse, you can also use the excellent SDBG plugin to debug your JSweet application with the debug perspective.
Installation
- Under Eclipse, go to: Help > Install New Software.
- Press the “Add…” button to add the JSweet.org update site.
- Follow the installation instructions (keep the default options) and restart Eclipse when prompted.
Update site URL
http://eclipse-update-site.jsweet.org
How to start from the quick start project
- Clone the jsweet-quickstart project from Github and import it to your workspace
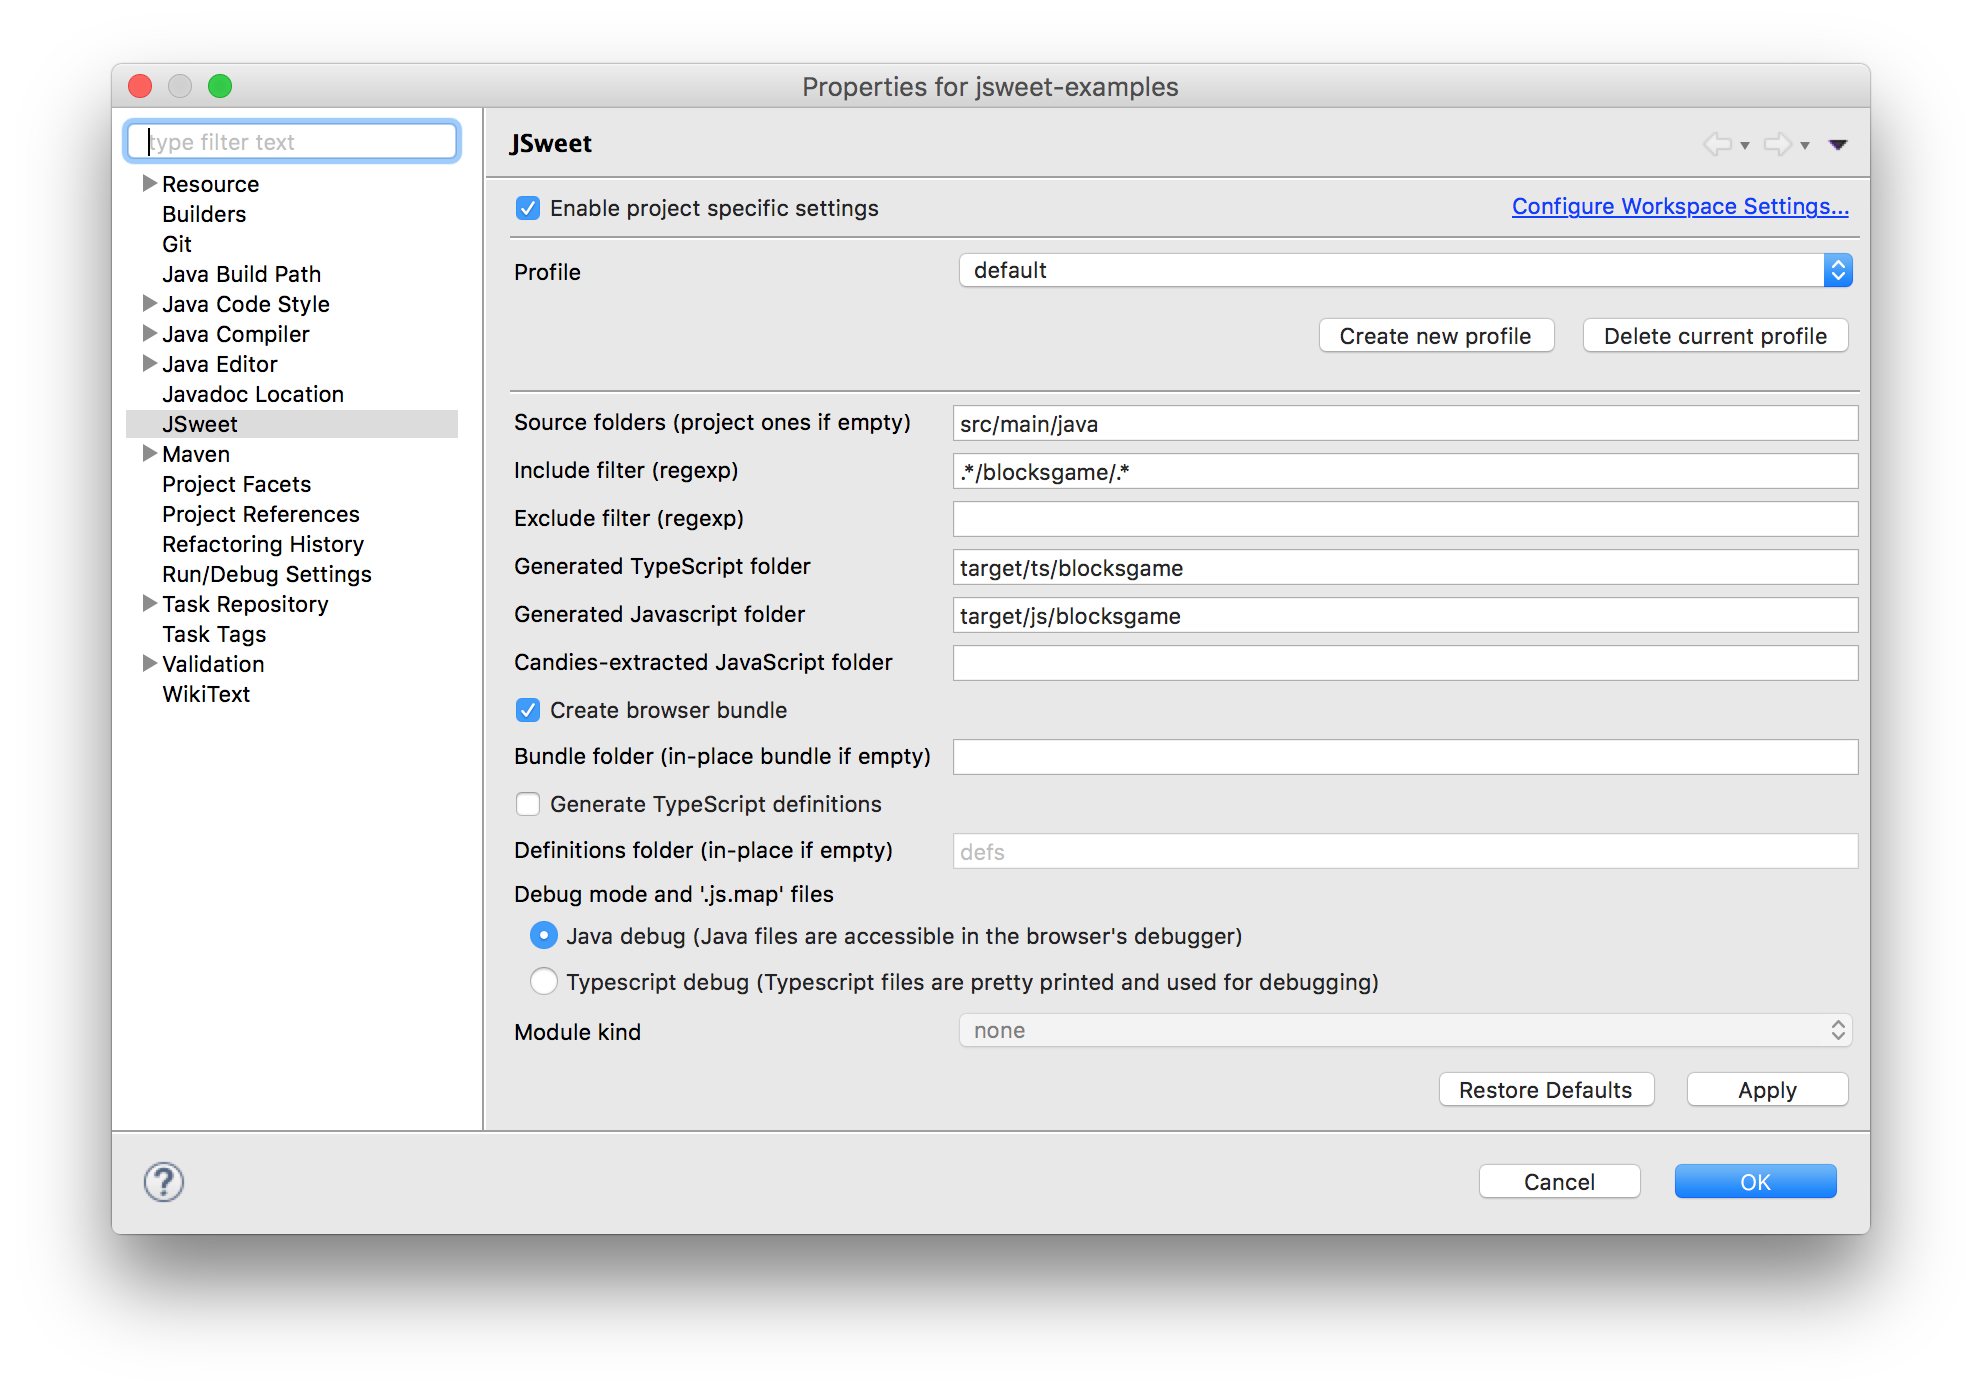
- Right click on your newly added project: Properties > JSweet > Enable project specific settings. Set the generated JavaScript folder to
target/js - Right click on your newly added project: Configure > Enable JSweet builder.
- Clean the project: the
target/jsshould be populated. - Right-click on
webapp/index.htmland choose Open with > System editor. If successful, your browser should popup an alert. - Read the following sections to get some hints on how to write JSweet code.
How to start from a blank project
Create and configure the project
- Create a new Java project: File > New > Java Project.
- Name it “jsweet-tutorial” (for instance). Press the “Finish” button to keep the default settings.
- Right click on your newly added project: Configure > Enable JSweet builder.
- Right click on your project: Configure > Convert to Maven Project. Leave all the default options.
- Edit your
pom.xmlto add the JSweet repository. Note that this step will not be mandatory in the future, when JSweet will be available in Maven Central.
<project xmlns="http://maven.apache.org/POM/4.0.0" xmlns:xsi="http://www.w3.org/2001/XMLSchema-instance" xsi:schemaLocation="http://maven.apache.org/POM/4.0.0 http://maven.apache.org/xsd/maven-4.0.0.xsd">
  <modelVersion>4.0.0</modelVersion>
  <groupId>jsweet-tutorial</groupId>
  <artifactId>jsweet-tutorial</artifactId>
  <version>0.0.1-SNAPSHOT</version>
  <!-- repositories -->
  <repositories>
    <repository>
      <id>jsweet-central</id>
      <name>libs-release</name>
      <url>http://repository.jsweet.org/artifactory/libs-release-local</url>
    </repository>
    <repository>
      <snapshots />
      <id>jsweet-snapshots</id>
      <name>libs-snapshot</name>
      <url>http://repository.jsweet.org/artifactory/libs-snapshot-local</url>
    </repository>
  </repositories>
  <!-- end repositories -->
  <build>
    <sourceDirectory>src</sourceDirectory>
    <plugins>
      <plugin>
        <artifactId>maven-compiler-plugin</artifactId>
        <version>3.1</version>
        <configuration>
          <source>1.8</source>
          <target>1.8</target>
        </configuration>
      </plugin>
    </plugins>
  </build>
</project>
pom.xml (at the root of your Java project), add a dependency to the core JSweet library (a.k.a. candy). This will add the JSweet core APIs to your classpath.<project xmlns="http://maven.apache.org/POM/4.0.0" xmlns:xsi="http://www.w3.org/2001/XMLSchema-instance" xsi:schemaLocation="http://maven.apache.org/POM/4.0.0 http://maven.apache.org/xsd/maven-4.0.0.xsd">
<modelVersion>4.0.0</modelVersion>
<groupId>jsweet-tutorial</groupId>
<artifactId>jsweet-tutorial</artifactId>
<version>0.0.1-SNAPSHOT</version>
...
<!-- dependencies -->
<dependencies>
<!-- JSweet core API -->
<dependency>
<groupId>org.jsweet.candies</groupId>
<artifactId>jsweet-core</artifactId>
<version>5-SNAPSHOT</version>
</dependency>
</dependencies>
<!-- end dependencies -->
...
</project>
Write your first program
- Right-click on the
srcfolder of your project and choose: New > Class. - As shown in the following screenshot, create a
HelloWorldJava class in ahelloworldpackage. Check the “create main method” option. - In the
mainmethod, type inaland press CTRL+SPACE. If correctly configured, thealertmethod ofjsweet.dom.Globalsshould be proposed by the auto-completion (JSweet adds some favorites static members automatically, so that you will get completion on globals such asalert()ordocument, as shown in the screenshot below). - Now, with the help of completion, write the following JSweet program, which will set the content of a div to “Hello world!” with first warning the user.

package helloworld;

import static jsweet.dom.Globals.*;
import jsweet.dom.HTMLElement;

public class Globals {
	public static void main(String[] args) {
		alert("This example writes 'Hello world' in the document!");
		HTMLElement e = document.getElementById("target");
		e.innerHTML = "Hello world!";
	}
}
js directory at the root of the project. You should find the generated JavaScript file at /js/helloworld/HelloWorld.js.
index.html file in the helloworld package, next to the HelloWorld class. We recommend that you use version of Eclipse for Web developers, or that you install the Web Developer Tools plugin available at the Eclipse’s market place.<!DOCTYPE html>
<html>
<head>
<meta charset="UTF-8">
<title>Hello world</title>
</head>
<body>
<div id="target"></div>
<script type="text/javascript" src="../../js/helloworld/HelloWorld.js"></script>
</body>
</html>